Google Translate

Showing posts with label Vegetarian. Show all posts

Saturday, 16 June 2012

Fava bean and tomato pasta

Fava beans generally get a bad rap.  I think it might have something to do with Anthony Hopkins or the fact that you have to peel them twice or that they can cause potentially fatal hemolytic anemia in people with hereditary glucose-6-phosphate dehydrogenase deficiency.  Whatever the reason, their poor reputation is ill deserved because their buttery texture, bright vegetal flavour and high protein content (26g/100g, more than steak or fish) really can't be beat.  Sure they take a lot of work and they might kill you ... or the people eating them might kill you ... but it's a small price to pay either way.

In addition to liver and a nice Chianti there are dozens of ways to enjoy the Fava bean, all of which are excellent.  I'm partial to this one because it's simple, fast, cheap and delicious.  It could be a base to a grilled pork chop or a stand alone meal as shown here.  You could replace the bacon with anchovies or capers if you were vegetarian or leave them out all together.
6 servings fresh or dried pasta
~15 pods fresh fava beans, shelled (50-100 beans)
1 pint cherry or grape tomatoes, halved
1/2 pound smokey bacon chopped
1/2 shallot, diced
1 clove garlic, diced
1 cup white wine
1 cup grated Parmesan cheese
1/2 tbsp olive oil
pasta of your choice (I used linguine)

Cook the bacon over low heat until crispy.  Remove to dry on paper towels.

Boil the beans in very salty water for ~5 minutes and then plunge them into ice water to that the skins loosen off the beans.  Peel the skin off the beans and set them aside in a bowl.

Saute the garlic and shallot in olive oil until soft and fragrant.  Add the tomatoes and cook until soft.  Add wine, reduce by half and set aside.

Cook the pasta in salted water until aldente and drain, reserving a cup of pasta water.  You can use dried pasta or our basic pasta dough if you've got the time and patience.


Toss the sauce, beans, bacon, Parmesan and pasta together in a serving bowl adding in the pasta water as necessary.


Thursday, 19 April 2012

Wild Rice Salad

According to Hollywood, grocery stores are among the most popular locations for attractive strangers to strike up random conversations and comedic romances to begin.  I'm not sure where the writers get this idea as, in my experience, it's exceedingly rare to see anyone engage in a polysyllabic conversation while wheeling their frozen peas and screaming 3 year olds through the isles.  In fact, the aforementioned children are often the only audible sound aside from the easy listening muzak pumped over the PA system in what I always assumed was an effort to subliminally condition us to associate Kenny G with concentrated orange juice and baby carrots.

Farmers' markets, on the other hand, are a completely different story.  Perhaps it's the patron's shared interests, that the vendors all have skin in the game or the prevalence of over-caffeinated yuppie scum but most farmers markets are chattier than a nail salon in a Queen Latifah movie.  Just this weekend while shopping in the St. Lawrence Market, I got to talking about wild rice with the guy manning Rube's Rice stand and he recommended this truly AWESOME recipe for wild rice salad.  He didn't remember where it originally came from so I'm going to give the credit entirely to him; Rube's friendly employee with the vaguely American accent.

Corporate grocers take note:  I went in to get a staple grain and left with an awesome recipe, at least twice the ingredients I originally intended and am now telling perhaps as many as nine people (two or three of which might actually live in Toronto) about his store by writing this post.  Repeat this scene at most big grocery stores and the best advice I'd likely get is that the Wild Rice is in aisle 4 next to the Extreme Fajita shells.

1 cup wild rice
5-6 cups light stock (veggie, chicken, duck or veal)
1 cup pecans, shelled and halved
1 cup cranberries
1 orange, juiced and zested
1/4 cup mint leaves, minced
3 small shallots, finely minced
1/4 cup olive oil
1 teaspoon salt
black pepper to taste

Rinse the rice and bring to a boil in the stock.  Simmer, uncovered, for 30-40 minutes until done (it should still have some bite to it), drain and let cool.  Mix remaining ingredients with the rice in a large bowl and set aside for at least a couple of hours to let the flavours meld.

Thursday, 12 April 2012

Pea pesto pasta

There are a lot of reasons to love summer and fresh peas are definitely somewhere on that list.  They might not be at the top (my guess is somewhere between miniature golf and garage sales) but it definitely wouldn't be summer without them.  Here in Ontario you can buy them fresh from the field at roadside stands through July and August.  They generally come in big baskets containing at least a million peas each (perhaps a slight underestimate but I've never actually counted). This is great if you're feeding a visiting basketball team, however, if you're just two people it leaves you with at least a couple hundred thousand spare peas to address.

The traditional use for surplus peas is, of course, the pea shooter: a straw or hollow tube through which you blow in order to force peas, previously jammed into the other end, to fly into the faces of your younger siblings.  If you don't have any younger siblings or if you can't find a tubular object of suitable diameter and feel that simply throwing the peas is beneath you then this recipe is another great way to address your glut of peas.  It's simple, fast, delicious, keeps well and is very healthy.

Here we use it as a pasta sauce but it's also great on crostini, as ravioli filling or eaten out of a Tupperware container with a spoon.

2 cups shelled sweet peas
1 cup grated Parmesan
3 cloves garlic
2 mint leaves
1/2 cup walnuts
2.5 tbsp olive oil
salt to taste

To make the pea pesto, place the walnuts in a food processor and pulse until well ground.  Add the peas, garlic, cheese and mint and puree while slowly adding in the olive oil until the peas are all broken up but not liquefied.  Season with salt to your preference.

Serve over fresh pasta, reserving a bit of pasta water to mix in as well.  You can use any pasta you like but I really like fresh spaghetti made from our basic pasta dough recipe.  

Monday, 9 April 2012

Artichoke and roasted garlic soup with garlic chips

  In the words of Colonel John "Hannibal" Smith"I love it when a plan comes together!"  As a kid I was heavily influenced by the George Peppard character from the A-Team.  He was everything I aspired to be: a brilliant tactician, unflappable in the face of danger, a leader of men, a master of disguise, altruistic, witty, a soldier of fortune, a fugitive from military justice and a close personal friend of Mr. T.  While the man I grew up to be may not quite measure up to Hannibal's standards (I never entered the military, am only a fugitive from the fashion police and the closest I've come to befriending Mr. T was to get his autograph at a jewelry store), occasionally my kitchen plans do come together nicely.

This soup is the result of two long standing projects: number one, to master the making of Thomas Keller's garlic chips and number two, to recreate an amazing artichoke soup I had while on a business trip.  While making batches of garlic chips it struck me as criminal to throw out the rich garlic-infused milk but without a ready use, I either dumped it out or let it go bad in the fridge and then dumped it out.  Simultaneously, I had been looking for a way to add depth and interest to my version of artichoke soup.  Then in a flash of inspired brilliance much akin to what Einstein must have felt when he perfected soup recipes, I decided to combine them.  The milk would become the creamy base to the soup and the chips would become the garnish.

4 large artichokes
2 heads of garlic (1 for roasting, 1 for chips)
2 white potatoes, peeled
1 leek, chopped
2 cups chicken or vegetable stock
2 cups milk
2 cups canola oil
1/2 tbsp butter
1 tbsp vinegar

Bring a large pot of water to a boil and add the vinegar and artichokes.  Test them by using tongs to pick up a choke by a single leaf.  They're done when the leaf pulls off simply from the weight of the choke.  Drain the artichokes and leave to cool.  Once cool, remove the leaves and chokes from the hearts and set them aside.  Reserve some of the leaves to serve as an appetiser (eat the rest in the kitchen without telling anyone).
To make the chips, slice the garlic cloves very thinly using a sharp knife or mandolin.  Cover them in 1/2 a cup of milk and bring to a simmer.  Drain and reserve the milk for the soup.  Rinse the garlic and repeat 3 more times until you've used all the milk.  Pat the garlic slices dry and fry in small batches in hot oil, leaving them to dry on paper towels.  You want to take them out before they go brown to prevent them from becoming bitter.  I use elephant garlic because it's milder in flavour and makes bigger chips but you can use any garlic.  If you do use elephant garlic then one clove will be more than sufficient as they're almost the size of cooking onions as seen at right.

To roast the garlic, cut 1cm off the top of the head, drizzle with oil and wrap in foil.  Roast the garlic at 300F until soft.

In a soup pot, saute the leeks in the butter until soft. Add the artichoke hearts, potatoes, roasted garlic and chicken stock and simmer until the potatoes are soft.  Blend the soup and add the garlic milk.  Return to simmer for 10 minutes to let the flavours combine.

Serve, garnished with garlic chips.

Friday, 24 February 2012

Creamy Mushroom Soup in Bread Bowls

For most of my life, my relationship with mushrooms has fluctuated between blind hatred and cool indifference. As a child, I would pick them out of stirfry, eat around them in salads, and recoil in horror if a rebellious mushroom somehow made it on to my pizza. In high school, I was voted "least likely to ever post a mushroom recipe on a food blog". Yet, here I am, defying expectations and embracing my former enemy with open arms. How did this happen? Clearly I have a great capacity for personal growth. My mushroom-loving boyfriend may have also had something to do with it. However, the tipping point came about a year ago when we were on vacation in Lake Placid. Adam ordered a mushroom soup that came served in a bread bowl. Initially I was indifferent, perhaps even slightly disappointed that he didn't order something delicious that I could sample. Then...the aroma wafted across the table and I became curious. How could something so vile, so greige, smell so appetizing? One spoonful turned to several spoonfuls (to Adam's dismay) and before I knew it, I was a mushroom fan. A mushroom soup fan, at least. This recipe is my attempt to recreate that game-changing meal.

My biggest beef with mushrooms ("mmm, beef with mushrooms" - Adam) has always been their texture. Unfortunately this precluded me from every appreciating their delicious woodsy flavour. This soup is blended until it's smooth and creamy, which means I can enjoy the Umami experience without issue.

Serves 4

drizzle of grapeseed oil
2 celery stalks, roughly chopped
3 shallots, diced
3 cloves garlic, minced
1 tablespoon fresh thyme
5-6 cups chopped mushrooms (I use oyster, shitake, and cremini)
4 cups chicken or vegetable stock
dash of Worcestershire sauce
3/4 cups heavy cream
salt and pepper
truffle salt to garnish (optional)
4 crusty buns

Heat a drizzle of oil in a large pot over medium-high heat. Add the celery and shallots and stir. Let cook for 2 minutes, then add the garlic and thyme. Saute for 2-3 minutes longer until softened. Add the chopped mushrooms and stir to combine. Saute for 5 minutes until the mushrooms have released their liquid and have softened (you'll know you're getting close when the mushrooms stop squeaking). Add the stock and Worcestershire and bring to a boil. Reduce heat to a gentle simmer, cover, and let cook for 10 minutes.

While the soup cooks, you can prepare the bread bowls. Cut around the edge of the bun and remove the top portion. Scoop out some of the bread inside to make a bowl (this is my cook's treat but you can also save it for bread crumbs).

Remove the soup from the heat. Using a stick blender (or in bathes in a regular blender), blend the soup until smooth. Add the cream and stir until incorporated. Taste the soup and season with salt and pepper as needed, it almost always needs a generous pinch of salt at this point. Give it one final stir to incorporate everything. Scoop into bread bowls, garnish with a sprinkle of truffle salt, and serve.  

Wednesday, 22 February 2012

Squash, Blue Cheese, and Arugula Pizza with Figs

I love this pizza. I love everything about it - the sweetness of the figs, the tangy blue cheese, the crust that is crisp on the outside and tender inside. I love nutritious and tasty addition of squash and arugula that allows me to pretend that, even though it's pizza, it's really not that bad for me (silence, carb haters!). I love the way it makes just enough for a weeknight meal for two with leftovers for lunch the next day. I love the way it tastes fresh from the oven. I love the way it tastes when eaten cold, straight from the office fridge. I love how it brightens my day, even as I eat it hunched over my desk at work while trying, frantically, to meet a deadline. I love how it embodies everything I would have hated to eat as a child (moldy blue cheese, mushy squash, green stuff!) but now love because I've matured into a worldly, food-blogging sophisticate. My only issue with this pizza is that it's difficult to eat it while patting myself on the back for being a worldly, food-blogging sophisticate, it's really a two-hand or knife and fork pizza.

Makes 1 large pizza (about 6-8 slices)
Pizza Dough
1 cup warm water
1 package active yeast (about 2 1/2 teaspoons)
1 teaspoon sugar or honey
2 1/2 cups flour (plus extra for dusting work surface)
1/2 tablespoon salt
2 tablespoons olive oil

Pizza Toppings
1/2 butternut squash (about 1 lb)
1 teaspoon crushed chili flakes
olive oil
6 dried figs, roughly chopped (you can also use fresh if available)
2 tablespoons crumbled blue cheese (goat cheese is also great)
1/2 cup grated Parmesan
1 1/2 cups arugula
salt and pepper

Combine the yeast, sugar, and warm water in a bowl or large Pyrex measuring cup. Let stand for about 10 minutes until the mixture is frothy. Combine the flour, salt, yeast mixture, and olive oil in a large mixing blow and mix together until well combined. Using your hands, form the dough into a smooth ball, adding more flour as needed. Cover the bowl of dough with plastic wrap or a tea towel and let rise until doubled in bulk, about 30-40 minutes.

Preheat oven to 400F. Peel the butternut squash and remove all the seeds. Slice the squash cross-wise into 1/4" thick pieces (the shape isn't important as long as they are evenly and thinly sliced). Arrange the squash on a baking sheet, drizzle with olive oil and sprinkle with salt, pepper, and chili flakes. Roast until the squash is tender, about 20 minutes. Remove from the oven and set aside. Turn the oven up to 425F.

Punch down the pizza dough and transfer to a floured work surface. Gently spread the dough into whatever shape you like. I bake this on an oiled rectangular baking tray but you could also use a pizza stone.  Bake for 3-5 minutes, until the dough has stiffened and is slightly puffed up but not browned. Remove from the oven and drizzle with olive oil. Arrange the squash slices, figs, and cheeses on the pizza dough and return to the oven for another 8-10 minutes or until the cheese is melted and dough is golden brown. Remove from the oven and sprinkle with arugula and freshly ground pepper. I like to let the arugula wilt for a minute or two before slicing and serving.

Thursday, 2 February 2012

Tomato Baked Eggs with Chard

It's been an exciting and hectic week (as soon as I wrote that I realized it's only Thursday, jeez). I've been inundated by new projects at work, we are anxiously awaiting the birth of my first nephew, and Adam and I closed on our first home and are now fully immersed in planning and executing a substantial renovation. Needless to say, all of this hasn't left a lot of time for grocery shopping or cooking. My diet this week has consisted mainly of champagne (new house!), croissants (standard meeting fare at work), and leftover chicken tagine (stay tuned for that recipe). Wait...why am I complaining?

While I could certainly do a lot worse, tonight I needed to get back on track and wanted to make something fast, light, and healthy that I could throw together with pantry and fridge staples. This recipe would be great for breakfast or a light lunch as well. I've baked it in ramekins but if you don't have any, you could also use a baking dish. Pour the sauce into the baking dish and crack an egg into each corner, then spoon out individual portions.

Makes 4 servings

drizzle of olive oil
1 medium onion, roughly chopped
3 cloves garlic, minced
2 teaspoons fresh thyme
1 teaspoon dried oregano
1/4 teaspoon crushed chili flakes
1 can diced tomatoes
1 cup strained tomato or tomato puree (I use Pomodoro tomatoes that come in a jar)
salt and pepper
1 tablespoon balsamic vinegar
1 small bunch of chard
4 eggs
2 tablespoons grated Parmesan
1 loaf of your favourite crusty bread

Preheat oven to 350F.
In a large pot, heat a drizzle of olive oil over medium-high heat. Add the onion and let cook for 2 minutes. Add the garlic, stir, and let cook for 3-5 minutes until the onions and garlic are soft. Add the thyme, oregano, generous pinch of salt and pepper, and crushed chili flakes and stir. Let cook for 1 minute, then add the diced and strained tomatoes and balsamic vinegar. Cover and let cook for 10 minutes.

While the tomato sauce simmers, wash the chard and trim off and discard the ends. Chop into 1" pieces. Taste the sauce and season with salt and pepper as required. Add the chard to the sauce and stir to incorporate. Let cook for another 5 minutes.

Arrange four ramekins on a baking sheet. Ladle the sauce into each ramekin, leaving about an inch of space at the top. Crack an egg into each ramekin, on top of the sauce. Sprinkle with a small pinch of salt and pepper. Bake the eggs until the whites are set but the yolks are still soft, about 8-10 minutes. Top with grated Parmesan and serve with a slice of crusty bread for dipping.

Sunday, 29 January 2012

Soft Polenta with Rosemary

I have often seen polenta on menus, on cooking shows and have once before tried it and do remember liking it; however, I have never tried making it.  I never really knew what to serve it with, or what it would be a good accompaniment to...something that I would usually serve with potatoes maybe, or rice?  I couldn't seem to figure it out.  Also, I was under the assumption that polenta required 'babysitting', ie: you cannot take your eyes off of it for even a second, as disaster may ensue (similar to my thoughts on risotto).  Polenta is a soft, pillowy bed for just about anything served on top, especially good for braised meats with rich sauces and I have discovered that it is quite easy to make and extremely versatile.  You could experiment with almost any combination of herbs and cheeses to compliment your dish, try thyme and goat cheese with pork or rosemary and blue cheese with beef, the combinations are endless!

3 cups stock, chicken or vegetable
1 cup water
1 clove garlic, minced
1 cup cornmeal
1/2 cup cream cheese
2 tbsp fresh rosemary, chopped
salt and pepper
1/2 cup Parmesan cheese

In a medium pot heat broth, water and garlic until boiling.  Turn heat to medium and slowly whisk in cornmeal, ensuring there are no lumps.  Once Cornmeal has been whisked in, turn heat to low and with a wooden spoon, stir constantly for about 10 minutes, until thick and creamy.

Off the heat stir in cream cheese, Rosemary, salt and pepper.  Finish by stirring in Parmesan cheese. 
Serve immediately, or if prepared slightly before eating, cover with lid and return to very low heat, stir occasionally so polenta does not stick to bottom of pot.

Thursday, 26 January 2012

Whole Wheat Pasta with Arugula, Roasted Sweet Potato and Goat Cheese

Once a week, the Onion Gogglers engage in a brutal and exhausting ritual known as "Wednesday Night Spin Class". The class is a tear-inducing, gruelling, sweatfest but is also lots of fun and immensely satisfying. So satisfying that I want to make the most of the "spinning shine", that feeling of doing something really good for your health, by extending healthy behaviours to other areas of my life. For me, the mid-week health boost means I focus more on eating well, getting plenty of sleep, and flossing for the day or so before and after each class (specifically, until the "Friday Night Bottle of Wine" ritual begins and it all goes out the window). I try to get to the gym throughout the rest of the week as well, but there's something about spinning that motivates me to be good more than any other exercise. Perhaps it's the tight shorts.

While I occasionally indulge in these, these, and plenty of this, most days we opt for meals like this one that are healthy and quick to make. This dish is full of good things: nutrient-dense vegetables, whole grains, and a sensible amount of cheese (because it makes me happy, which is good for you too).  It's ideal as a quick week night supper and the leftovers are great for lunch the next day. For all you carb-haters, it's also delicious if you omit the pasta and make a salad version topped with pumpkin seeds and an egg or cup of cooked lentils for protein.

Makes 4 servings

2 sweet potatoes, chopped into 1" cubes
2 tablespoons olive oil
pinch of crushed chili flakes
pinch of salt
freshly ground pepper
4 cups arugula
2 tablespoons goat cheese
1/4 cup grated Parmesan
3 cups whole wheat pasta (I used whole wheat egg noodles)
1/4 cup reserved pasta water

Heat the oven to 400F. Arrange the sweet potatoes on a baking sheet, drizzle with 1 tablespoon of olive oil and sprinkle with chili flakes and salt and pepper. Roast for 25-30 minutes until the sweet potatoes are soft and being to brown.

While the sweet potatoes cook, crumble the goat cheese into a large serving dish along with the arugula, Parmesan, and a generous pinch of pepper. Bring a large pot of boiling, salted water to boil. Add the pasta and cook until al dente. Reserve a 1/4 cup of pasta water and drain the rest. Add the warm pasta, sweet potatoes, and pasta water to the bowl with the arugula. Toss to coat and allow the heat from the pasta and sweet potatoes to wilt the arugula and melt the cheese. Drizzle with the remaining olive oil and serve.

Wednesday, 25 January 2012

Roast Tomatoes with Pesto


Succulent, sweet and slightly acidic all at the same time, fresh tomatoes are an amazing thing.  Unfortunately, they are available for about 45 minutes here in Canada when summer ends and fall begins.  The rest of the year our tomatoes resemble granny smith apples in colour and texture so that they may survive the trip north to our frozen land.  The result is something that looks like a tomato, bounces like a lacrosse ball, tastes like plywood and is best used as a projectile weapon to deter burglars.  If, however, you roast these woody little spheres, they come close resembling actual tomatoes and are quite delicious, giving you the illusion of it being late August instead of late January.

4 tomatoes
1 tablespoon olive oil
1/2 tablespoon balsamic vinegar
2 tablespoons pesto
salt and pepper to taste

Preheat oven to 375F. Cut the tomatoes into quarters, removing the woody white roots of the stem. Toss to coat in olive oil and balsamic and sprinkle with salt and pepper.
Roast in the oven until the tomatoes start to break down and caramelize, about 30-40 minutes. Remove from oven, top with pesto and serve. 

Friday, 20 January 2012

Kale Panzanella

There are a lot of things you can do with a stale loaf of bread (feed pigeons, make bread crumbs, bludgeon your enemies) but this one might just be the best.  The first time I tried it was in a little Italian restaurant on the lower east side of Manhattan with our friend Veronica.  I had just discovered the wonder that is Kale and reflexively ordered it when I saw it on the menu.  I actually had no idea what the dish was when I ordered but to this day I am exceedingly glad that I did.  It's hearty, healthy (mostly), extremely delicious and best of all it's frugal since it uses bread that you might otherwise have thrown out.

2 pints cherry tomatoes
Splash of gape seed oil
1 large bunch of kale (about 6-8 cups)
1/2 loaf crusty bread (ideally stale, leftover bread)
3 cloves garlic, finely minced
1/3 cup water
1/4 cup olive oil
3 tbsp balsamic vinegar or juice of 1 lemon
salt and pepper

Preheat oven to 350F.
Arrange the cherry tomatoes in a baking dish and toss with a drizzle of grape seed oil and pinch of salt and pepper. Roast in the oven until they turn soft and start to shrink, about 30 minutes. Remove from the oven and set aside.

Dice the bread into 1" cubes. In total, you'll need about 3 cups of bread. Arrange the cubes on a baking sheet and toast in the oven til golden, about 5-10 minutes, turning part way through. Remove from the oven and set aside.

Remove the tough ribs and ends from the kale and discard. Tear the kale leaves into pieces and rinse in a colander under cold water. In a large pot, heat a drizzle of oil on medium-high heat. Add 2/3rds of the garlic and saute for a few seconds until fragrant. Add the kale and 1/3 cup of water (a splash of white wine also works well). Reduce the heat to medium-low and saute with the lid on for 5 minutes, stirring occasionally. Cook until tender but still al dente. Drain any remaining water from the pot.

To make the salad dressing, whisk together the olive oil, balsamic vinegar or lemon juice and pinch of salt and pepper and about half a teaspoon of very finely diced garlic. In a large salad bowl, combine the tomatoes (along with any juices), bread, and kale. Add the dressing and toss to coat. Serve warm or at room temperature. 

Wednesday, 18 January 2012

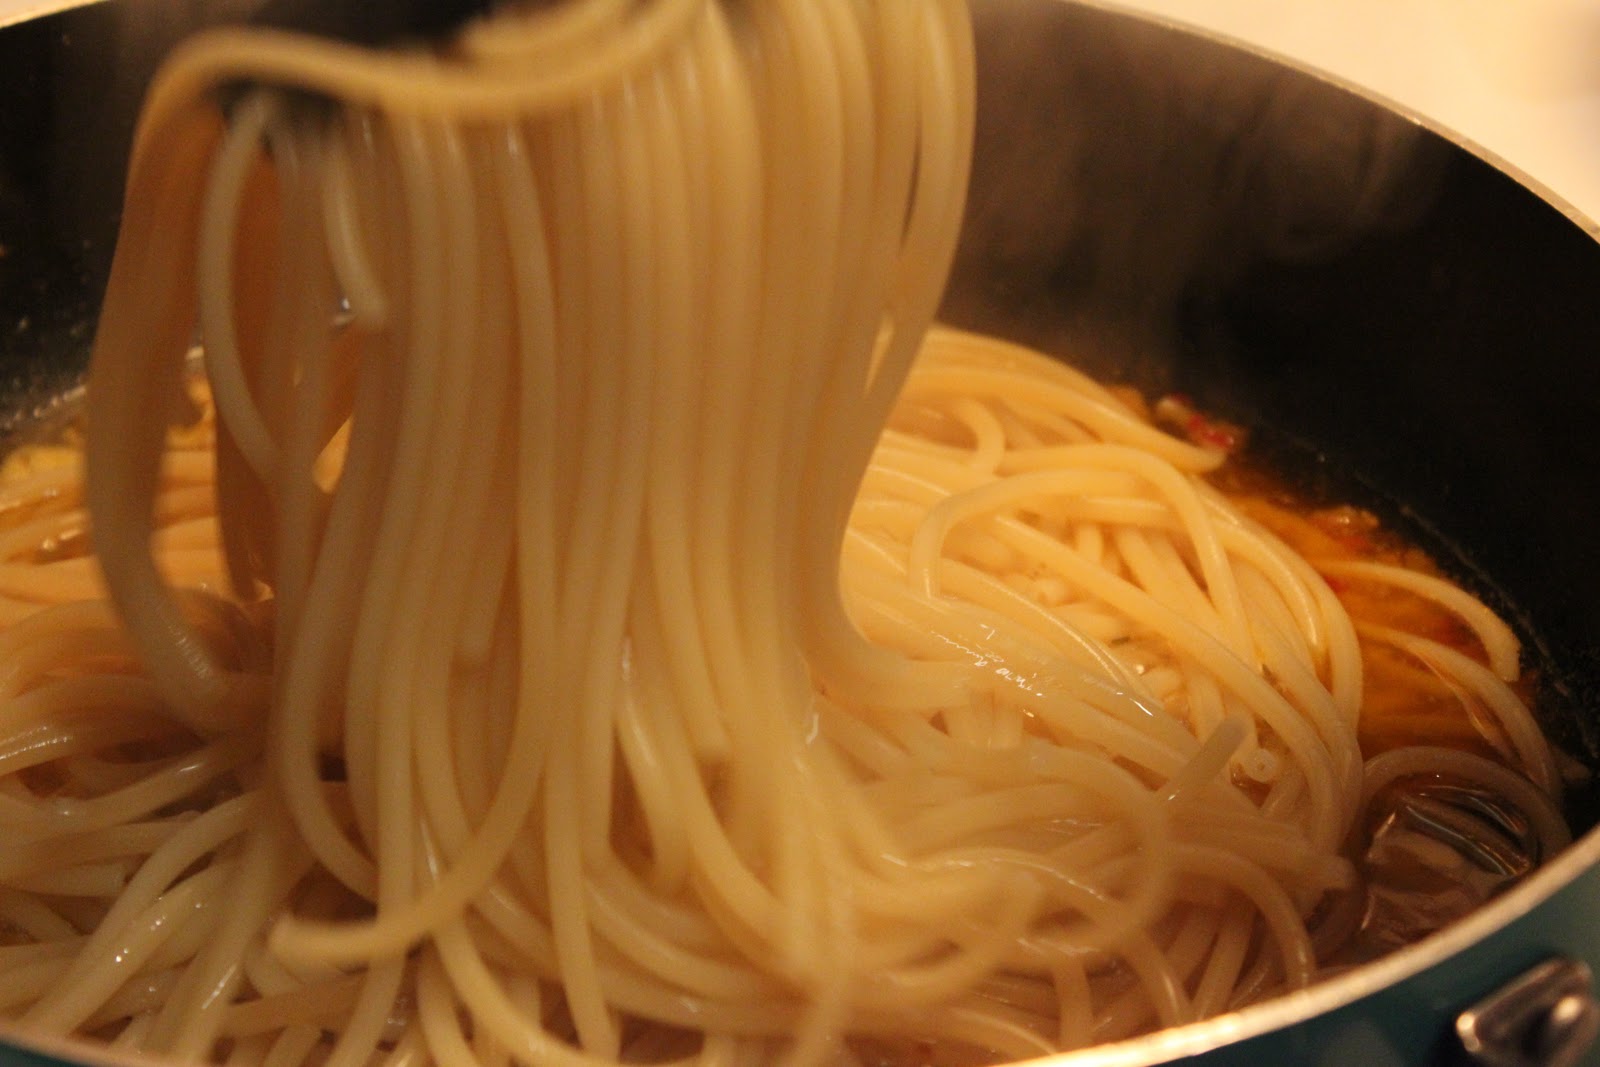
Bucatini Aglio, Olio e Peperoncino

If you are like me, you love Asian food and as with many Asian recipes you need one teaspoon of this and two tablespoon of that, which leaves your pantry chockfull of an array of condiments.  However,  many of these ingredients can do 'double-duty' and cross cultural boundaries. In this recipe garlic-chili paste is the star of a quick and easy Italian pasta dish. 

1 tbsp salt
1/4 cup + 1 tsp olive oil
1/3 cup Panko breadcrumbs
5-6 cloves garlic, sliced thinly
2 tbsp garlic-chili paste
3 ladle fulls, pasta water
1 package Bucatini pasta
1/4 cup chopped parsley
1/2 cup Parmesan cheese

Bring a large pot of water with salt to a boil. In a small pan heat 1 tsp olive oil and add breadcrumbs and toast until golden brown.  Remove from heat and set aside.

In your largest skillet (this will be used to toss all the pasta) heat 1/4 cup olive oil on medium heat and add garlic, cook for 3 minutes. 

Add pasta to water, cooking until al dente (about 6-7 minutes).

While pasta is cooking, add chili paste to the skillet with the garlic and stir. Cook for 2-3 minutes.  Add 3 ladle-fulls of pasta water and continue to simmer.  Once pasta is cooked through, remove with tongs and add to skillet with garlic and chili.  Add parsley and toss well to coat pasta.  Remove from heat, add Parmesan, and toss. Serve with a sprinkle of toasted breadcrumbs.

Saturday, 7 January 2012

Roasted Cauliflower and White Bean Soup

I credit my older sister with a lot: getting me into bars before I was 19, showing me how to pluck my eyebrows, and of course, getting me into trouble. She also introduced me to this soup which has now moved to the top of my healthy and delicious recipe list. Last month we featured a cauliflower recipe where I touted the merits of oven roasting to bring out the vegetable's nutty sweetness. Wisely, my sister used the same strategy here and also added white beans to up the protein and add more depth. This quick, easy soup is delicate, flavourful and surprisingly hearty.  I like to add a light drizzle of nut oil before serving.

drizzle of olive oil
1 head of cauliflower
3 cloves garlic,peeled and smashed (not chopped)
1 medium onion, coarsely chopped
1 litre chicken stock
1 can white kidney beans or navy beans
salt and freshly ground pepper
1/2 cup freshly grated Parmesan
drizzle of walnut or hazelnut oil

Preheat oven to 350F.
Remove the leaves and tough stems from the cauliflower and break into pieces. Arrange on a baking sheet along with the garlic cloves, drizzle with olive oil, and gently toss to coat. Roast in the oven until the cauliflower is tender and begins to brown, about 20 minutes.

In a large soup pot, heat a drizzle of oil over medium heat and add the onion. Heat until softened, about 5 minutes. Add the roasted cauliflower, garlic, and chicken stock and bring to a boil. Reduce the heat and simmer with the lid on til the cauliflower is falling apart, about 5-10 minutes. Add the beans. Remove from heat and puree the soup with an immersion blender until smooth. You can also puree in a blender in small batches. Add the Parmesan and stir to incorporate. Season with salt and pepper to taste. Garnish each serving with a drizzle of walnut or hazelnut oil and more freshly ground pepper.

Thursday, 5 January 2012

Chipotle Black Bean Burritos with Avocado Cream

I made this for a friend of mine when he came to our house for a weeknight dinner. He's the kind of guy who will eat hot wings seven days a week if given the opportunity so I knew I had to make some hearty boy food. I also wanted something healthy as I'd promised to make margaronas (a margarita with an upside down Corona stuck in it...) which are decidedly unhealthy. This dish seemed like a good balance. In the end, I failed to deliver on the margaronas (really...a Corona stuck in it) but as my friend reached for a third helping, it didn't seem to matter.

The recipe calls for canned chipotle peppers in adobo sauce. I only use one chipotle pepper and bit of sauce, though they usually come in a can with several. You can add more peppers if you like but be warned, these are spicy little guys. Save the rest of the peppers and sauce in a container in the fridge and add them to chili, soups, or salsa. You can use leftover avocado cream as a dip for fresh veggies, serve it on a sandwich instead of mayo, or use it as a garnish for eggs.

This dish is also great if you omit the tortilla and serve it over rice, sort of like a burrito bowl. I also occasionally add a fried or poached egg on top for a high protein/breakfast version.

Black Beans
4-6 whole wheat tortilla wraps (corn tortillas are good too)
drizzle of grape seed oil
1 medium onion, thinly sliced
1 chipotle pepper and 1 tablespoon of adobo sauce
1 small tomato, chopped
salt and pepper to taste
1/2 bell pepper, thinly sliced
1 can black beans (I used the no salt added kind)
1/2 cup fresh or frozen corn niblets
2 tablespoons chopped fresh cilantro
1/2 cup grated cheddar cheese
1 green onion, chopped
avocado cream  (recipe below)

Avocado Cream
1 ripe avocado (make sure it's very ripe)
2 tablespoons plain Greek yogurt
juice of 1/2 a lime
pinch of salt

To make the avocado cream, scoop out the avocado into a bowl and add the yogurt, salt, and lime juice. Mash with a fork until roughly combined then puree with a hand mixer. If you don't have a hand mixer you could also make this in a blender or food processor.

In a large pot, heat a drizzle of olive oil over medium-high heat. Add the onion and cook until translucent and soft, about 5 minutes. Reduce the heat to medium. Roughly chop one chipotle pepper and add it to the pot, along with about a tablespoon of the adobo sauce. Add the chopped tomato and stir to combine. If it's winter and your tomatoes aren't very juicy, I recommend adding a tablespoon of water as well. Season with a pinch of salt and freshly grated black pepper. Cover with a lid and cook for 2-3 minutes.

In the meantime, strain the beans and rinse under cold water until the water runs clear. Add the peppers, beans, and corn to the pot and stir. Reduce the heat to low, cover with a lid, and cook for another 2-3 minutes just to heat through. Remove from the heat and stir in the chopped cilantro.

Warm the tortillas in the microwave for a few seconds so they are easier to fold. Spread a dollop of the avocado cream in the centre of the tortilla. Top with a generous spoonful of the black bean mixture, some grated cheddar cheese, and a few chopped green onions. Roll up the tortilla, tucking the ends in, and serve.

Wednesday, 4 January 2012

Smoky Tomato Soup

In honour of a New Year's resolution to be healthier and in light of all of the overeating and indulgence over the holidays, our posts this month will include many healthy recipes from various sources.  One of these sources of inspiration for this health-kick is a book which contains recipes that are not so much 'health foods' as recipes that focus on fresh produce, lean meats, and less oil, salt, and sugar. The aforementioned cookbook is the Flat Belly Diet Cookbook, by Liz Vaccariello.  My first 'healthy' dinner of 2012 was this smoky tomato soup.  I made this soup for some girlfriends who came over to watch the season premiere of The Bachelor (our Monday night TV indulgence) and it was quite a hit.  We ate it without the avocado but decided that this would be a great soup for chili-like toppings such as corn, black beans or a sprinkle of cheddar cheese. I also reduced the amount of smoked paprika in the recipe to one teaspoon and found that this was enough to be smoky without being overpowering.

Adapted From: The Flat Belly Cookbook

4 Servings (1 1/4 cups each)

Nutrition per Serving (with avocado)
180 calories
6 g protein
22 g carbs
7 g fat
1.5 saturated fat
6 g fibre

2 14oz cans  fire-roasted tomatoes
1/2 sweet onion, sliced
1 cup reduced sodium vegetable broth
1 cup water
1 tsp smoked sweet paprika
1/4 tsp chipotle chili powder
1 cup buttermilk*
dollop of fat-free Greek yogurt to garnish
1 avocado, sliced to garnish

*If you do not have buttermilk you can make an equivalent substitute by combining 1 cup milk with 1 tbsp of vinegar.  Stir and let rest for 10 minutes before using.  For this recipe I used 1 cup skim milk and 1 tbsp of red wine vinegar to mimic the buttermilk.

Preheat oven to 350F.  Grease a baking dish or lasagna pan. Pour the tomatoes (with juice) into the pan and scatter the sliced onions over the top. Bake for 50 minutes to 1 hour until the mixture is thick and the onions begin to brown.

Transfer the mixture to a blender. Add the broth, water, paprika and chili powder and puree until smooth.  Heat the soup mixture in a pot over medium-low heat until heated through.  Add the buttermilk and stir to combine.  Ladle into 4 soup bowls, or mugs, and garnish with Greek yogurt and avocado slices or other toppings of choice.

Review (out of 5): *****

Friday, 16 December 2011

Vegetarian sushi rolls

Of all my personal shortcomings (and there are many), the one I'd change first is my fish allergy.  You might be wondering why a guy who can't eat fish is writing a post about sushi and your concerns are indeed valid.  After all, what can a guy who can't so much as look at a fish stick tell you about making sushi?

Well as it happens, quite a bit.  Because of my allergy, I can't really eat sushi in a restaurant as even the vegetarian rolls inevitably get contaminated.  So if I want to eat sushi I have to make it myself, which I do quite frequently.  It's easy, delicious and makes one of the best appetizers ever.

Because the fish is generally uncooked, making sushi is really about rice and rolling.  That and buying really good fish but you're on your own on that front.

Rolls:
1 cup sushi rice
1 1/2 cups water
1 package noori (seaweed paper)
1 tablespoon rice wine vinegar
1 teaspoon sugar

Vegi-filling (all items julienned):
1 avocado
1/2 red pepper
1/2 mango
1/2 cucumber

Wash the rice in a strainer until the water runs clear.  This is key as if you don't do it the rice won't become properly sticky and you'll end up with something more akin to rice pudding.

Put rice in a pot and add water until rice is just covered.  Add sugar and heat on medium high.  When water boils, stir rice, turn heat to low and cover with a tight lid.  Simmer until water has cooked off (~10-15 minutes) and remove rice to a large bowl to cool.  As rice cools start cutting and folding it with a wooden spoon while gradually adding in the vinegar.  As it cools, the rice will start to take on the sticky texture that holds the rolls together.

Place noori on a sushi mat and use two spoons to spread rice on top in a thin layer, leaving 1" or so of free space at the top of the noori sheet.

Arrange filling in a thin line starting 1" above the bottom of the noori. Use the mat to roll the noori up and over the filling, contunuing until the noori is rolled into a tight cylinder. Repeat until filling and rice are all used up or until you run out of places to store the vast quantities of sushi you have made.

Let rolls rest for ~2 minutes so that noori has a chance to seal before cutting.  When cutting the rolls, wipe some sesame oil across the knife to prevent it from sticking to the rolls.

Serve with soy sauce, wasabi and pickled ginger.


Wednesday, 14 December 2011

Roasted Romanesco cauliflower


If you've never roasted broccoli or cauliflower, I strongly urge you to try it. Roasting caramelizes the sugars in the vegetables (yes, vegetables contain sugar) and results in a sweet, nutty flavour with none of the usual bitterness. Unlike steamed or boiled versions, which tend to be a little on the mushy side, roasting preserves some of the vegetable's texture. When Adam spotted this gorgeous Romanesco cauliflower at the market we knew we had to try it this way.

Romanesco cauliflower is somewhere between broccoli and regular cauliflower in taste and texture. It's unarguably the most beautiful of the three and I find it slightly sweeter as well. Adam would be disappointed if I didn't mention it's mathematical properties; the spirals on the head of the cauliflower follow the Fibonacci sequence, which basically makes this vegetable a big deal if you're a math whiz. All I know is that it barely made it on to the plate as the three of us scarfed it down straight from the pan.


2 heads Romanesco cauliflower
drizzle of olive oil
pinch of chili flakes or chili powder
pinch of salt and pepper
1 1/2 tablespoons whole wheat bread crumbs
2 tablespoons freshly grated cheese (I usually use a combination of Parmesan and cheddar)

Preheat the oven to 400F and line a baking sheet with parchment paper. Remove the thick stems and base of the cauliflower and break the head into pieces. Toss the cauliflower with the olive oil, chili flakes, salt and pepper and spread out evenly on the baking sheet. Mix the bread crumbs and cheese together in a bowl and sprinkle over the cauliflower. Roast for 25-30 minutes until golden and fork tender.

Friday, 9 December 2011

Breakfast Overnight - Steel Cut Oats

I have never really been a 'morning person' or a fan of breakfast for that matter and would rather sleep in for 10 extra minutes than make eggs, or toast, etc.  However, this has recently changed since I discovered steel cut oats and an extremely easy way to make them.  Now, when I wake up my breakfast is actually waiting for me!  Steel cut oats have great texture, unlike quick cooking oatmeal, however with that require quite a bit of time to soften.  In this recipe, adding the oats to hot water and letting sit overnight, allows the oats to slowly absorb the water and soften, where only heating is required in the AM! 

drizzle veg. oil
1/4 cup Steel Cut Oats
1 cup hot/boiling water
1 cinnamon stick

1/4 cup milk
1 tbsp maple syrup
blueberries or any fresh fruit

Before bed:  In a saucepan with a lid, heat a drizzle of oil, and add the oats.  Toast the oats over the heat for about 1-2 minutes.  Add cinnamon stick and water and bring to a boil.  Then turn off the burner and cover with lid.  Let this sit on your stove covered overnight.

Sleep zzz

Morning:  Add milk to the oats, and heat on medium til warm. Pour into bowl and drizzle with 1 tbsp of maple syrup and blueberries or fresh fruit.


Thursday, 1 December 2011

Spinach, Artichoke & Roasted Red Pepper Lasagna

This lasagna is a great way to feed a family and satisfy everyone (meat eaters included).  However, I know some of you are thinking veggie lasagna is boring, lacks a rich flavour or that all the veggies fall out once it is cut and served. To avoid all the prior I have combine chopped spinach and marinated artichokes directly into the sauce, doing this imparts great flavour to the sauce and makes assembly much quicker as you are not spending time layering vegetables in addition to the noodles and cheese.  The other great thing about this recipe is that you can keep most ingredients on hand in the pantry, only having to shop for a couple items like ricotta and fresh herbs, which makes this easy to whip up on short notice (perhaps family or friends dropping in for a weeknight dinner)!


Serves a crowd
25 mins prep time
65 minutes bake time

1 tbsp olive oil
1/2 large onion chopped (or 1 small)
2 cloves garlic, squished
1 pkg frozen chopped spinach, thawed and squeezed of excess water
1 large jar marinated artichokes, chopped
fresh basil, chopped (as much as you like)
1/2 tsp dried oregano
1/2 tsp red pepper flakes
2 jars of your favourite tomato sauce (divided) 1 1/2 jars and 1/2 jar
1/2 cup water
1 jar roasted red peppers, thinly sliced

1 cup shredded skim mozzarella cheese
1 container light ricotta cheese
1/4 cup fresh grated Parmesan cheese + extra for topping
1/2 cup fresh chopped parsley
1 egg
salt & pepper
1 box (375 g) ready cooked lasagna noodles

Preheat oven to 350 degrees F and grease a 9x13" baking dish.
In a large saute pan over medium heat saute, onion, garlic, spinach, artichokes, basil, oregano and red pepper flakes in the olive oil. Add in 1 1/2 jars pasta sauce and water and simmer 10 minutes.
In a large bowl mix mozzarella cheese, ricotta cheese, Parmesan cheese, parsley, salt, pepper and egg. Set aside.

Place a 1/2 of reserved plain sauce (1/4 jar) in the bottom of a baking dish. Place layer of uncooked noodles on top of sauce and top with thin layer of spinach sauce. Add layer of noodles and layer with 1/2 spinach sauce followed by 1/2 cheese mixture then layer on all sliced roasted red peppers, add another layer of noodles and repeat with remaining spinach sauce and cheese. Last layer with noodles and top with rest of reserved plain sauce.

Cover with foil and bake in a preheated oven for 55 minutes.  After 55 minutes, remove foil sprinkle with extra Parmesan and bake another 10 minutes. Let sit 10 minutes before serving.

Monday, 28 November 2011

Shredded beet salad

I've spent the past week travelling in Colombia and, like any decent vacation, a main highlight of my travels was sampling the local fare. I delighted in giant platefuls of roasted meat combined with all the best starches - yuca, plantain, corn, and of course potatoes. I sampled chicharrĂ³n, otherwise known as the Spanish pork rind. I was also thrilled to learn that Colombians have mastered the art of making gelato (I triple checked this fact to be sure this wasn't a fluke). After a week of enjoying all of this, combined with the usual vacation diet of cocktails and wine, I was in the mood for something fresh, light, and nutritionally dense. Enter the beet.

Beets are low in calories and high in fibre, vitamin C, folate, and something called Glycine betaine that is great for your heart. They're also delicious (mom, you were right, I did learn to love beets). If you don't like beets, try eating them raw. They're sweet, crisp, and refreshing. I strongly suggest using a food processor to grate them as grating them by hand may result in a hot pink kitchen disaster.

2 large beets, peeled and grated
juice of 1 orange (about 3 tablespoons)
juice of 1/2 lemon (about 1 tablespoon)
1 teaspoon ground coriander
1/8 teaspoon ground cardamom
1/8 teaspoon ground cumin
1 1/2 tablespoon walnut oil
salt and pepper
1/2 cup chopped walnuts

Combine the juices, spices, oil, and a pinch of salt and pepper in a salad bowl and whisk together. Add the grated beets and walnuts and gently toss to coat. If you want to get fancy, garnish with a sprig of watercress or mache and serve.