Google Translate

Tuesday 31 January 2012

Quick Broccoli Rabe


For those "broccoli' haters out there (and I mean you Jess) I challenge you to try this recipe and not like it.  Although broccoli rabe may contain the name 'broccoli' I assure you it tastes nothing like the version you are thinking you hate right now - the kind that is steamed to a soft mush with little chewing required.  Broccoli rabe is also known as rapini and is much more bitter and peppery than traditional broccoli, think bok choy meets arugula, tipped with tiny broccoli heads.  Just another way to Eat Yer Greens!


2 tbsp olive oil
3 cloves garlic, sliced
1 bunch of broccoli rabe, trimmed and cut into 1 1/2" pieces
salt and pepper
pinch of chili flakes or 1 tsp chili garlic paste

In a large skillet over medium heat 2 tbsp olive oil, once oil is hot - add garlic and fry until golden brown, about 2 minutes.  Remove slices with a slotted spoon and set aside.  Add broccoli rabe, chilis, salt and pepper to skillet and cook over medium heat for 5-7 minutes, add splash of water and cook an additional 2 minutes.  Return sliced garlic to skillet and toss to incorporate.  Serve.

Monday 30 January 2012

Ice Cream Cookie Cups

I'm an engineer by education and so I'm a stickler for efficiency.  As such, I'm a big fan of meals with edible containers.  Sandwiches, calzones, burritos, and chili in a bread bowl all strike a chord deep within my fussy engineering psyche.  In the words of George Steinbrenner (aka, Larry David): "From 1973 to 1982 I ate the exact same lunch every day: turkey chili in a bowl made out of bread. Bread bowl, George. You'd eat the chili, then you'd eat the bowl. Nothing more satisfying than looking down after lunch and just seeing a table."

Thus, I was completely bowled over when I saw this idea on The Daily Buzz.  The idea had all the hallmarks of brilliance (simple, repeatable, obvious in retrospect, and delicious) and I am still amazed that it took me almost 32 years to come across it.

The process is remarkably simple: flip over your muffin tray and grease the outside of it (yeah, you read that right). Then mound the cookie dough over the bumps.  Bake for ~10 minutes at 350F until the dough sets and pop your cookie cups off to cool.

As the cookies bake, the dough will flow down and around the bumps on the muffin tin.  Thus, it's a good idea to use a cookie dough that doesn't spread out too much as it will just flow off the mold and pool at the bottom.  T-Moo's oatmeal chocolate chip dough is ideal.

You can fill these with just about anything you want but I used vanilla ice cream and steeped strawberries, topped with a strawberry rosewater coulis because I really wanted to cook something with rosewater in it!

Coulis:
1 cup diced strawberries
2 tbsp sugar
1/2 tsp rose water
1/2 cup water
1 tsp butter

Saute the berries in the butter for 1 minute, add the rest of the ingredients and simmer until reduced by half.  Blend with an immersion blender or actual blender and strain over dessert.

Steeped berries:
1 cup strawberries, quartered
1/2 tbsp sweet balsamic vinegar
1 tsp sugar

Toss to coat and reserve for 30-minutes to an hour in the fridge.

Sunday 29 January 2012

Soft Polenta with Rosemary

I have often seen polenta on menus, on cooking shows and have once before tried it and do remember liking it; however, I have never tried making it.  I never really knew what to serve it with, or what it would be a good accompaniment to...something that I would usually serve with potatoes maybe, or rice?  I couldn't seem to figure it out.  Also, I was under the assumption that polenta required 'babysitting', ie: you cannot take your eyes off of it for even a second, as disaster may ensue (similar to my thoughts on risotto).  Polenta is a soft, pillowy bed for just about anything served on top, especially good for braised meats with rich sauces and I have discovered that it is quite easy to make and extremely versatile.  You could experiment with almost any combination of herbs and cheeses to compliment your dish, try thyme and goat cheese with pork or rosemary and blue cheese with beef, the combinations are endless!

3 cups stock, chicken or vegetable
1 cup water
1 clove garlic, minced
1 cup cornmeal
1/2 cup cream cheese
2 tbsp fresh rosemary, chopped
salt and pepper
1/2 cup Parmesan cheese

In a medium pot heat broth, water and garlic until boiling.  Turn heat to medium and slowly whisk in cornmeal, ensuring there are no lumps.  Once Cornmeal has been whisked in, turn heat to low and with a wooden spoon, stir constantly for about 10 minutes, until thick and creamy.

Off the heat stir in cream cheese, Rosemary, salt and pepper.  Finish by stirring in Parmesan cheese. 
Serve immediately, or if prepared slightly before eating, cover with lid and return to very low heat, stir occasionally so polenta does not stick to bottom of pot.

Friday 27 January 2012

Cran-Apple Oatmeal Muffins

I was recently stocking up on some kitchen supplies when I came across a huge display of beautifully patterned paper muffin cups. Now normally I am more of the ‘cooking’ type but there is something about brightly coloured muffin cups that convinces me that I can be a better baker and, regardless of what is inside of them, if I use nicer cups my baked goods be more delicious. With this in mind, I purchased four packages of 60 cups each, effectivly signing myself up for a years worth of baking. I am happy to say that as good as these muffins are when baked inside a greased muffin tin, unwrapping them from a lovely paper cup makes them more of a treat!  I usually eat these as a breakfast on the go or packed as an afternoon snack.  The addition of grated apple keeps these muffins moist, making them great for freezing.
Makes 12-14 muffins

1 large apple, grated
1 cup milk
1/4 cup vegetable oil
1 egg
1 tsp vanilla
1 cup cranberries, frozen
1 1/2 cups oatmeal, large flakes
1 cup flour
1 tbsp ground flax
1/2 cup sugar
1 tbsp baking powder
1/2 tsp salt
1/4 tsp cinnamon
2 tbsp sliced almonds


Preheat oven to 375F.
Line muffin tins with papers and spray with cooking spray to grease.

In a medium bowl combine grated apple, milk, oil, egg, and vanilla and mix well.  Set aside.
In a large bowl combine oatmeal, flour, flax, sugar, baking powder, salt, and cinnamon and mix well.  Add reserved wet ingredients to flour-oatmeal mix and stir to incorporate.  Stir in cranberries and almonds.

Fill muffin cups to the top and bake for 20-25 minutes, or until toothpick can be inserted in centre and removed cleanly.  Remove from muffin tin and cool completely on a cooling rack.


*If freezing, wrap individually in plastic wrap, then freeze.  To thaw, remove muffin from freezer, let stand overnight and enjoy in the morning.

Thursday 26 January 2012

Whole Wheat Pasta with Arugula, Roasted Sweet Potato and Goat Cheese

Once a week, the Onion Gogglers engage in a brutal and exhausting ritual known as "Wednesday Night Spin Class". The class is a tear-inducing, gruelling, sweatfest but is also lots of fun and immensely satisfying. So satisfying that I want to make the most of the "spinning shine", that feeling of doing something really good for your health, by extending healthy behaviours to other areas of my life. For me, the mid-week health boost means I focus more on eating well, getting plenty of sleep, and flossing for the day or so before and after each class (specifically, until the "Friday Night Bottle of Wine" ritual begins and it all goes out the window). I try to get to the gym throughout the rest of the week as well, but there's something about spinning that motivates me to be good more than any other exercise. Perhaps it's the tight shorts.

While I occasionally indulge in these, these, and plenty of this, most days we opt for meals like this one that are healthy and quick to make. This dish is full of good things: nutrient-dense vegetables, whole grains, and a sensible amount of cheese (because it makes me happy, which is good for you too).  It's ideal as a quick week night supper and the leftovers are great for lunch the next day. For all you carb-haters, it's also delicious if you omit the pasta and make a salad version topped with pumpkin seeds and an egg or cup of cooked lentils for protein.

Makes 4 servings

2 sweet potatoes, chopped into 1" cubes
2 tablespoons olive oil
pinch of crushed chili flakes
pinch of salt
freshly ground pepper
4 cups arugula
2 tablespoons goat cheese
1/4 cup grated Parmesan
3 cups whole wheat pasta (I used whole wheat egg noodles)
1/4 cup reserved pasta water

Heat the oven to 400F. Arrange the sweet potatoes on a baking sheet, drizzle with 1 tablespoon of olive oil and sprinkle with chili flakes and salt and pepper. Roast for 25-30 minutes until the sweet potatoes are soft and being to brown.

While the sweet potatoes cook, crumble the goat cheese into a large serving dish along with the arugula, Parmesan, and a generous pinch of pepper. Bring a large pot of boiling, salted water to boil. Add the pasta and cook until al dente. Reserve a 1/4 cup of pasta water and drain the rest. Add the warm pasta, sweet potatoes, and pasta water to the bowl with the arugula. Toss to coat and allow the heat from the pasta and sweet potatoes to wilt the arugula and melt the cheese. Drizzle with the remaining olive oil and serve.

Wednesday 25 January 2012

Roast Tomatoes with Pesto


Succulent, sweet and slightly acidic all at the same time, fresh tomatoes are an amazing thing.  Unfortunately, they are available for about 45 minutes here in Canada when summer ends and fall begins.  The rest of the year our tomatoes resemble granny smith apples in colour and texture so that they may survive the trip north to our frozen land.  The result is something that looks like a tomato, bounces like a lacrosse ball, tastes like plywood and is best used as a projectile weapon to deter burglars.  If, however, you roast these woody little spheres, they come close resembling actual tomatoes and are quite delicious, giving you the illusion of it being late August instead of late January.

4 tomatoes
1 tablespoon olive oil
1/2 tablespoon balsamic vinegar
2 tablespoons pesto
salt and pepper to taste

Preheat oven to 375F. Cut the tomatoes into quarters, removing the woody white roots of the stem. Toss to coat in olive oil and balsamic and sprinkle with salt and pepper.
Roast in the oven until the tomatoes start to break down and caramelize, about 30-40 minutes. Remove from oven, top with pesto and serve. 

Tuesday 24 January 2012

Maple Whisky Glazed Hen with Wild Rice Stuffing

I have a tradition of buying a bottle of scotch from the duty free store every time I'm out of the country. Over time I've built up quite a collection of almost twenty scotches, however, we live in a condo and the amount of room we can allocate to booze storage is somewhat limited, so T-Moo has enacted a 1 in 1 out policy in our liquor cabinet.  Seeing as I have a hefty travel schedule coming up and not being one to break with tradition, I needed to find a way to up my scotch consumption. A Robbie Burns day meal seemed like the perfect fit!

We scoured around our favourite web hangouts for inspired whiskey recipes and came across Zen Chef's AWESOME sounding recipe for soy-whiskey glazed baby chicken with sticky rice stuffing.  It really was an ideal pairing as this weekend was also Chinese new year, however, we wanted to roll with a slightly more earthy flavour to complement the smoky whiskey so we substituted sticky rice with wild rice and brown rice and then swapped out soy with maple syrup to maintain the sweetness we lost by losing the sticky rice.  The results are a little bit Scottish, a little bit Canadian, inspired by a French chef's Asian hybrid creation and 100% delicious.

4 pheasants or Cornish game hens
2 cups duck or chicken stock
3/4 cup brown rice
1/4 cup wild rice
1/3 cup walnuts
1/3 cup dried cranberries
1 onion diced
1 cup rough chopped shitake mushrooms
2 cloves garlic diced
3 sprigs thyme
3/4 cup smooth whiskey (I used Dalwhinnie)
1/4 cup smoky whiskey (I used Ardbeg)
1/2 cup maple syrup
2 tbsp brown sugar

Brown the mushrooms in some oil or butter and set aside.  Saute the onions and garlic in a little oil until soft.  Add the stock, bring to a boil, add the wild rice and turn down to a simmer. Cover and simmer for 5 minutes then add the brown rice and simmer for 15 minutes more until rice is cooked.  Add in the nuts, cranberries, 1 oz of smoky whiskey, and thyme mix well and set aside to cool.

While the rice is cooking, make the whiskey glaze by combining the remaining whiskey and the maple syrup and simmering gently until reduced by half.  Clean and brine the birds (I had to do this as mine were frozen and my guests were arriving shortly).  When the rice is cool enough to handle, stuff the birds with the rice mixture and place in a roasting pan on a rack.  Place the remaining stuffing (if there is any) into a casserole dish or ramekin.

Cook the birds at 400F, basting with the glaze every 10 minutes until juices run clear or the meat registers 170F on an instant read thermometer.  Remove the birds to a platter and cover with foil  Add a half cup of water and any remaining glaze to the roasting pan and bring to a boil on the stove, stirring to scrape up any bits from the pan.  When sauce has reduced by half, strain it to a fat separator if needed or directly to a gravy boat.

We served half a bird per person by slicing the birds in half down through the breast (they're small so you shouldn't have trouble if your knife is sharp) and served each portion on top of a gratin of potato, tomato and zucchini.  

Monday 23 January 2012

Really French Toast a l'Orange

This recipe is proof positive that sometimes playing it safe and being ordinary simply won’t do.  Some days you have to go completely over the top.  Nobody knows this better than Sir Elton Hercules John, a man who dares to ask; "Why wear jeans and a t-shirt when you can sport a sequinned jumpsuit and pink rhinestone glasses?"

Indeed, I ask; "why use regular bread for your French toast when you can use buttery, flaky croissants drowned in custard?"  Well health might be one reason and it goes without saying that any recipe that begins with croissants and ends with butter and maple syrup is probably not the healthiest ... but it is the most delicious.  Thanks to my usually health-conscious mom for inspiring this recipe!

I bake this instead of frying because the croissants are very delicate and tend to fall apart. However, if you insist on frying, soak the croissants in the egg mixture for only a few seconds on each side as they soak up the custard much faster than bread.

6 croissants (best if they are a day old)
4 eggs
1 1/4 cup whole milk
1 tsp vanilla
¼ cup orange juice
zest of one orange
½ tsp cinnamon
½ tsp nutmeg (freshly grated is best)
Butter for greasing the baking dish
Maple syrup

Preheat oven to 350F. Grease a medium sized baking dish with butter.  I usually use a 9 inch round x 3 inch deep casserole dish.

Slice each croissant in half lengthwise and pack them into the dish. If you can't fit them all in, don't worry, you can squish them down more once the egg mixture is added. Whisk the remaining ingredients together in a bowl and pour about half of the the mixture over the croissants. Gently push the croissants down to help them soak up the egg mixture. Add the rest of the croissants if necessary and top with the rest of the mixture. The liquid should almost reach the top of the croissants with some pieces left sticking out. You can top it up with a bit of milk if necessary. Bake until puffed and golden, about 35-40 minutes.
Serve warm with maple syrup.

Saturday 21 January 2012

French Onion Soup

Winter is finally upon us in Toronto and with temperatures plunging to -27C with windchill I have been craving dishes that help warm me up from the inside out.  When my sister and I were younger, after playing in the snow or being forced into shovelling the driveway we would come into the house and have some French Onion soup out of little brown crock bowls to warm up. The French Onion soup we were eating was heated from frozen and was from M&M meat shops, and, up until now this has been my only interaction with French Onion soup. I have now realized how simple this soup is to make from scratch, and other than a bit of time to caramelize the onions this recipe comes together quickly and beats anything from the frozen food aisle!

Serves 4 (meal sized portions)

1 tbsp olive oil
3 1/2  large, red onions, sliced
5 sprigs of thyme, divided
1 tsp salt
1/4 cup Port wine
1/4 cup red wine or cooking wine
1 can beef broth
2 1/2 cup water
2 tsp soy sauce
1 tsp Worcestershire sauce
1 tsp cornstarch
black pepper to taste
1/2 cup Gruyere, grated
1 clove garlic, peeled and left whole
4 slices of a baguette or fresh bread,sliced 1/2" thick
4 slices Swiss cheese

In a large skillet with a lid heat oil over medium heat and add onions, 4 sprigs of thyme and salt. Cooking stirring often for 5 minutes. Turn heat to medium-low and cover.  Cook onions until soft and caramelized, about 30-40 minutes, stirring every so often.

Once onions soft and caramelized turn heat to high and add Port and wine, cook for 2 minutes.  Next add broth, water, soy and Worcestershire simmer partially covered for 15-20 minutes.  

While the soup is simmering, turn broiler to high heat, and grate the Gruyere and set aside.

On a baking sheet place slices of baguette and broil each side until nicely toasted.  Once baguette is toasted, rub each slide with the clove of garlic, then place one slice of Swiss cheese a top of each slice of bread.

Dissolve cornstarch in 1 tbsp of water, and stir into soup.  Let soup simmer another 3-4 minutes.

Just before you are ready to serve soup, place bread with Swiss under broiler and broil until cheese melts and is bubbling.  Remove from oven and sprinkle with leaves from remaining sprig of thyme. 

Ladle soup into bowls and sprinkle with grated Gruyere, and finish by place a piece of toasted, cheesy bread into the centre of bowl.  Serve.

Friday 20 January 2012

Kale Panzanella

There are a lot of things you can do with a stale loaf of bread (feed pigeons, make bread crumbs, bludgeon your enemies) but this one might just be the best.  The first time I tried it was in a little Italian restaurant on the lower east side of Manhattan with our friend Veronica.  I had just discovered the wonder that is Kale and reflexively ordered it when I saw it on the menu.  I actually had no idea what the dish was when I ordered but to this day I am exceedingly glad that I did.  It's hearty, healthy (mostly), extremely delicious and best of all it's frugal since it uses bread that you might otherwise have thrown out.

2 pints cherry tomatoes
Splash of gape seed oil
1 large bunch of kale (about 6-8 cups)
1/2 loaf crusty bread (ideally stale, leftover bread)
3 cloves garlic, finely minced
1/3 cup water
1/4 cup olive oil
3 tbsp balsamic vinegar or juice of 1 lemon
salt and pepper

Preheat oven to 350F.
Arrange the cherry tomatoes in a baking dish and toss with a drizzle of grape seed oil and pinch of salt and pepper. Roast in the oven until they turn soft and start to shrink, about 30 minutes. Remove from the oven and set aside.

Dice the bread into 1" cubes. In total, you'll need about 3 cups of bread. Arrange the cubes on a baking sheet and toast in the oven til golden, about 5-10 minutes, turning part way through. Remove from the oven and set aside.

Remove the tough ribs and ends from the kale and discard. Tear the kale leaves into pieces and rinse in a colander under cold water. In a large pot, heat a drizzle of oil on medium-high heat. Add 2/3rds of the garlic and saute for a few seconds until fragrant. Add the kale and 1/3 cup of water (a splash of white wine also works well). Reduce the heat to medium-low and saute with the lid on for 5 minutes, stirring occasionally. Cook until tender but still al dente. Drain any remaining water from the pot.

To make the salad dressing, whisk together the olive oil, balsamic vinegar or lemon juice and pinch of salt and pepper and about half a teaspoon of very finely diced garlic. In a large salad bowl, combine the tomatoes (along with any juices), bread, and kale. Add the dressing and toss to coat. Serve warm or at room temperature. 

Thursday 19 January 2012

Pork and Scallion Dumplings

I love dumplings, or as I like to call them 'dumps'.  However calling them dumps to a group of persons not familiar with this nickname has elicited some strange and confused looks.  Dumplings, potstickers, gyoza, wontons, dumps...call them what you will, they are delicious.  I consider myself somewhat of a dump connoisseur as I have sampled many varieties, and the following combination of ingredients is one of my favourites.  Pork is classic and provides great flavour and  water chestnuts give some texture to this filling.  MMM!

Makes ~ 60 dumps

1 pkg wonton wrappers
1 lb lean pork, ground
1 bunch scallions, finely chopped
1 8oz can water chestnuts, finely chopped
2 cloves garlic, minced
1 tbsp ginger, minced
2 tsp garlic-chili paste
1 tbsp soy sauce
1 tbsp rice wine vinegar
1 tbsp cooking wine
1 tsp corn starch
cold water

Dumpling Sauce:
1 tbsp soy sauce
2 tsp rice wine vinegar
1 tsp sugar
1/2 tsp sesame oil
1/2 scallion, sliced

In a small bowl combine garlic, ginger, garlic-chili paste, soy sauce, rice vinegar, wine and corn starch. Set aside.

In a large bowl combine pork, scallions and water chestnuts, mixing to combine. Add reserved mixture and mix to incorporate.

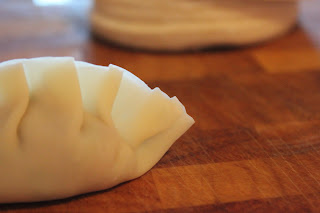
Fill a ramekin or small bowl with cold water. Fill wonton wrappers with two teaspoons of filling and wet one edge of the wonton wrapper with cold water.  Fold wrapper over to create half-moon shape, pleating as you go.  Dumplings can also be folded into a half-moon shape and then folded tip-to-tip to create a wonton for soup.  Learn how to fill and fold a dumpling as mentioned.

Place folded dumplings on a baking tray lined with parchment paper and cover with a damp paper towel. This will prevent the dumplings from drying out and cracking while you continue to fill the remaining wrappers.

Steam or pan fry dumplings and serve with sauce.

Steamed Dumplings:

In a bamboo steamer, steam dumplings 12 minutes. 


Pan fried Dumplings:
Heat a large skillet with 1 tbsp of vegetable oil and pace dumplings flat side down, cooking until brown on bottom about 1-2 minutes.  Add water to skillet until 1/2 way up the side of dumplings and cover with lid.  Steam until water has almost completely evaporated.

Wednesday 18 January 2012

Bucatini Aglio, Olio e Peperoncino

If you are like me, you love Asian food and as with many Asian recipes you need one teaspoon of this and two tablespoon of that, which leaves your pantry chockfull of an array of condiments.  However,  many of these ingredients can do 'double-duty' and cross cultural boundaries. In this recipe garlic-chili paste is the star of a quick and easy Italian pasta dish. 

1 tbsp salt
1/4 cup + 1 tsp olive oil
1/3 cup Panko breadcrumbs
5-6 cloves garlic, sliced thinly
2 tbsp garlic-chili paste
3 ladle fulls, pasta water
1 package Bucatini pasta
1/4 cup chopped parsley
1/2 cup Parmesan cheese

Bring a large pot of water with salt to a boil. In a small pan heat 1 tsp olive oil and add breadcrumbs and toast until golden brown.  Remove from heat and set aside.

In your largest skillet (this will be used to toss all the pasta) heat 1/4 cup olive oil on medium heat and add garlic, cook for 3 minutes. 

Add pasta to water, cooking until al dente (about 6-7 minutes).

While pasta is cooking, add chili paste to the skillet with the garlic and stir. Cook for 2-3 minutes.  Add 3 ladle-fulls of pasta water and continue to simmer.  Once pasta is cooked through, remove with tongs and add to skillet with garlic and chili.  Add parsley and toss well to coat pasta.  Remove from heat, add Parmesan, and toss. Serve with a sprinkle of toasted breadcrumbs.

Tuesday 17 January 2012

Seared Pork Chops with Blood Orange Glaze


I was reading CNN.com earlier today, catching up on the latest entertainment news (ok, it was people.com) when I came across an article about Uggie, the canine star of the Golden Globe winning film "The Artist". Apparently Uggie stole the show from George Clooney during Sunday's awards ceremony, giving Clooney a run for his money when it comes to making the fans gush. Now, you all know I love a good metaphor....well, here comes another. In this recipe, the role of Clooney is played by the pork chop. Normally, the drool-worthy star of any dish, here it takes a supporting role to an unexpected star: the delectably sweet, sour, and slightly spicy blood orange glaze.

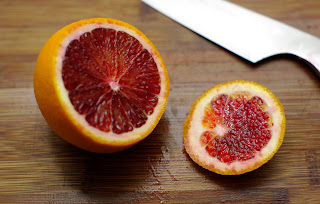
This glaze is simple to make, provided you can get a hold of blood oranges, which happen to be available in abundance right now at our local grocery store. Be sure to use the blood orange variety as regular naval oranges wouldn't be as good or as delightfully fuschia. I paired this glaze with pork but it would also be delicious with veal chops, chicken, or even fish. Serve this dish with sauteed kale, asparagus, or any other green.

Makes 2 servings
1/2 cup blood orange juice
zest of 1 blood orange
2 tablespoons sugar
1 tablespoon red wine vinegar
1 sprig rosemary
pinch of crushed chili 
pinch of salt
2 pork chops
drizzle of grape seed oil
salt and pepper

Preheat oven to 400F. 
Combine the orange juice, zest, sugar, vinegar, rosemary, chili and salt in a pot and bring to a boil. Reduce heat to simmer and let cook until the sauce has reduced by half, about 10-15 minutes.  The sauce is done when it coats the back of a spoon (generally when the bubbles look like they do at right).

Sprinkle both sides of the pork chops with salt and pepper.  Heat a drizzle of grape seed oil in a cast iron or oven proof pan. When the pan is hot, add the pork chops. Sear for 3 minutes and then flip and sear for 1 minute on the other side. Transfer the pan to the oven and roast for 5-8 minutes or until the pork chops reach an internal temperature of 155F. Spoon the blood orange sauce over each pork chop. Garnish with orange slices and serve. 

Monday 16 January 2012

Hawaii 5-0-My-God Pulled Pork


To really do this recipe right you need a big fire, a large pit and about 6 hours of free time. Fortunately, to do it well enough all you need is an oven and about 4 hours, which is a good thing for those of us who live in condos and have day jobs but still want to enjoy pulled pork.  However, I highly recommend using the fire pit method at least once in your life because it's really fun, all your friends will remember it, and you get to use a shovel as a cooking tool!

As the name suggests, the key to making this dish great is pineapple.  Aside from making fantastic head dresses, pineapples have some of the best meat tenderizing properties you'll ever find.  They get this amazing property from two sources, the first is a high acid content and the second, more potent source, is a collection of proteolytic enzymes commonly called Bromelain.

These enzymes are so effective they are used as the main ingredient in most commercial meat tenderizers and even some pharmaceuticals.  However, they're only present in fresh pineapple as they break down under heat.  What's more, they are much more common in the core and stem than in the fruit, so you'll want to buy an actual pineapple and not just some juice or one of those pre-peeled and cored numbers.  The side benefit is that the pineapple top makes a fabulous table garnish!

1 pork shoulder (~0.5lb/person)
1 pineapple peeled and roughly chopped but not cored
2 large onions, chopped (one for the pork, one for the sauce)
1/4 cup brown sugar
1 tbsp grated ginger
3 cloves of garlic
4 cups orange or pineapple juice
1 cup chicken stock or duck stock
2 packages banana leaves
2 tbsp hoisin sauce

Ingredients for Challah and Jicama coleslaw

Using a chef's knife, open several large cavities in the pork shoulder and stuff them with about half the pineapple including all of the bits of core and the first onion.  Place the pork in a large non-reactive container and add half of the remaining pineapple, 1 tablespoon of hoisin, and 2 cups of the juice and refrigerate for 6-24 hours.  I do this in the plastic vaccum bag that my butcher wraps the shoulder in which is handy.

If cooking the pork in the oven, banana leaves are optional but will add an element of festive authenticity. If cooking the pork in a fire pit, you'll definitely want to wrap it well in several layers of banana leaves. Remove the pork from the fridge and wrap it so that no pork shows through.  This can be very tough to do as the banana leaves have a nasty tendency to rip, thus I recommend having two packages of leaves on hand.  If using the fire pit method, wrap the shoulder in at least three layers of leaves as the outer two are likely to burn through and use uncoated bailing wire to tie it all up. If you`re cooking the pork in an oven or on the BBQ, butcher twine should be just fine to secure the leaves.


If you're cooking this the oven or on the BBQ, place the pork in a roasting pan and cook for roughly 4 hours at 300F, uncovering for the final half hour.

If you're going authentic, dig a hole roughly double the size of the pork shoulder in dry dirt or sand.  In your hole, build a bonfire out of hardwood and let it burn down so that you've got a pile of coals at least the size of the pork itself (this will likely take a couple of hours so start early). Dig a well in the coals, nestle your little porcine package into it with your shovel and cover with more coals.  Cook for about 3-4 hours.  Unless your original bonfire was particularly epic, you'll need to keep another fire going beside the coal pit for pretty much the whole day so that you can continuously replenish the coals as they peter out.  As such, I'd recommend getting yourself a good friend, a comfortable deck chair and about 24 beers.


While the pork is cooking, saute the garlic, ginger, and remaining onions until the onions are caramelized.  Add the remaining 2 cups of juice, stock, brown sugar, remaining hoisin and pineapple slices and simmer until reduced by 2/3rds. The sauce is ready when it coats the back of a spoon. Remove from heat and set aside.

T-Moo and I serve this on tiny Challah knots and top with jicama and red cabbage coleslaw with a lime dressing.  I batch of Challah dough makes about 24 slider-sized buns. Make the dough as directed and then tie small knots out of it instead of making a big braid.

Dig the pork out from the coals or remove it from your oven/BBQ and let rest for 10-15 minutes in a roasting pan.  Unwrap the banana leaves and discard.  Shred the pork using two forks (sterilized garden tools actually work way better than forks) and add the BBQ sauce.  Serve on Challah buns and top with coleslaw.

Sunday 15 January 2012

From the kitchen of my "Indian Mama" - Tandoori Chicken

The third, long-overdue recipe in the series From the kitchen of my "Indian Mama" can be prepped in advance if necessary which provides an easy way to get some intense flavour on the table during a busy work week.  This marinade can be applied to any cut of any dense protein such as chicken, beef or lamb.  Originally my "Indian Mama" suggested I use a whole roasting chicken for this; however, as a single household dweller this would mean that I would be consuming Tandoori chicken for breakfast, lunch and dinner the entire week...not that I am that opposed to the idea.  So, I choose to use this marinade on boneless, skinless chicken thighs and cook them by broiling them until cooked through and slightly charred.  This gives the chicken a slightly smoky flavour and during the Winter months saves you from a trip braving the cold, to your outdoor grill.  This chicken is excellent served on it's own, but depending on how much spice you add to your marinade a cooling raita served alongside is a nice match to tame the flames.

Serves 2 with chicken left over for lunch.  Try a chicken Tandoori sandwich!

8 chicken thighs, boneless, skinless
1/2 cup plain yogurt
2 tbsp vegetable oil
1 tbsp garlic-ginger paste (see recipe below)
1/2 tsp salt
1/2 tsp turmeric
1/2 tsp mirch aka cayenne pepper
2 tbsp Kissan Brand* Tandoori masala

*Why Kissan Brand? Because my "Indian Mama" said so. However, if you choose to make your own Tandoori masala  I have linked a recipe from Indian Food Forever

In a medium bowl stir together yogurt, oil, ginger-garlic paste, salt, turmeric, cayenne pepper and masala.  Add chicken to masala mixture and stir to coat well.  Marinate for one hour up to 8 hours. (This is a great recipe to prep before work, making it ready to pop under the broiler when you get home) 

Set broiler to high heat, and move oven rack to top level.  Prepare a rimmed baking sheet with parchment paper or a Silpat.

Remove chicken from marinade and place onto baking sheet.  Place chicken under broiler and broil for 18 mintues, turning once after 8 minutes.  Chicken is done when firm to the touch, and slightly charred on top.

Serve and enjoy a little taste of India!

Ginger-Garlic Paste

1/2 cup whole garlic cloves, peeled
1/2 cup fresh ginger, peeled and cut into small pieces
1/4 cup vegetable oil

In a small food processor, combine garlic, ginger and oil.  Puree until smooth, or until there are no large pieces of garlic or ginger left - there will be some coarseness, as the ginger is fibrous.  This paste can be kept in the fridge for about 2-3 weeks.

Saturday 14 January 2012

Banana Blueberry Almond Bread

I don't really like bananas. If you eat one that's too green, it's starchy and mealy. If you find a ripe one, you have to try ever so hard not to bruise it by gently placing it in your grocery bag with soft items like toilet paper. Then you return home, place it in the fruit bowl, and somehow the next morning it has countless brown spots (which to me means it's inedible).  I can never seem to get the timing right for a perfect banana and therefore end up with a lot of rotten ones. What other foods could we let sit on the counter for weeks, then consume in a tastier version than its usual form?  Anyway, my solution for these countless rotten bananas is no surprise: banana bread. However, this banana bread is a departure from your usual recipe as ground almonds replace some of the flour, which gives this bread a delicate, nutty, sweet flavour (yes, the sprinkle of almonds on top also provides nutty flavour, I know, but those with a discerning palate will know what I am talking about ). 

3/4 cup flour
1/4 cup ground almonds
2 tsp baking powder
1/2 tsp salt
1/2 tsp cinnamon
1/4 cup unsalted butter, softened
1/2 cup sugar
2 eggs
1/4 tsp almond extract
2 ripe bananas, mashed
3/4 cup frozen blueberries
1 tbsp raw sliced almonds

Preheat oven to 350F and grease a loaf pan.

In a medium bowl combine flour, ground almonds, baking powder, salt and cinnamon.  Set aside.

With an electric mixer and a large bowl or in the bowl of a stand mixer fitted with a paddle attachment, cream together butter and sugar until well combined, about 3 minutes.  Add eggs, one at a time, and mix until well incorporated.  Add almond extract and bananas and mix to combine. 

Gradually add the flour mixture to the banana mixture, and mix until just combined.  By hand, stir in blueberries and mix until well distributed in the batter.  Pour batter into prepared loaf pan and sprinkle top with sliced almonds.  Bake for 40-45 minutes or until a toothpick inserted in the centre comes out clean.

Cool on a baking rack for 10 minutes in the pan then remove from the pan and cool completely.

Friday 13 January 2012

Ginger and Garlic Flank Steak

Flank steak is one of my favourite cuts of meat. It's relatively inexpensive, cooks quickly, and has lots of flavour. It's also lean, high in protein, and a great source of iron which, as we all know, helps us play.

There are two essential rules to cooking flank steak. First, as with most meats, you have to let it rest before you slice it to lock in all those delicious steaky juices. Second, you have to slice it across the grain.

Ahh, but what exactly is this "grain" I speak of and which direction is "across"? Well class, take a closer look at your steak and you'll notice muscle fibres running in one direction. If you cut your steak in the same direction as those fibres, you'll end up with a tough, stringy piece of steak that no human mouth can chew. However, if you slice across the muscle fibres in thin strips, they'll break apart more easily and your eating experience will be far less agonizing.

I often like to serve this with baby bok choy sauteed with a little garlic, crushed chili, and a drop of sesame oil.

1 medium flank steak (approx 2 lbs)
4 cloves garlic, peeled and smashed
2 tbsp freshly grated ginger
2 tsp crushed chili flakes
2 bottles of ginger beer or ginger ale
1 tbsp soy sauce
dash of Worcestershire sauce
freshly ground pepper

Combine all ingredients in a shallow dish. Marinate the flank steak for at least 30 minutes. I usually aim for about 2 hours.

Remove the steak from the marinade and pat dry with paper towel. Heat a drizzle of grape seed oil on high in a large cast iron frying pan or grill pan. Once the pan is hot, add the steak. Cook for about 3 minutes per side for medium rare. Remove the steak from the pan and let it rest for 5-10 minutes before slicing. Slice in thin strips across the grain and serve.

Thursday 12 January 2012

Spicy, Salty and Sweet Snack Mix

A good snack mix is hard to come by. There is always just a little too much of something you don't really like.  For me, it's the copious amounts of peanuts in a bag of mixed nuts or the Cheerios in a handful of Bits 'n Bites.  I don't think that one should have to dislike any part of snacking.  Snacking is great, and for me it really helps beat the 3 PM 'slump' on a busy day.  So, I've created a snack mix with all the things that  I enjoy and no peanuts or Cheerios in sight!


Makes about 16 servings (1/2 cup each).

3 1/2 cups Chex or Crispix cereal
3 1/2 cups pretzel sticks
1 1/4 cups almonds, natural
1/2 cup pecans
1/2 cup walnuts
1/3 cup sunflower oil or vegetable oil
2 tsp Worcestershire sauce
2 tsp Dijon mustard
2 tsp chili powder
1 tsp hot pepper sauce
squeeze of lime juice
1/2 tsp cumin
1/2 tsp salt
pinch of onion power & chili flakes
1 tbsp sugar

Preheat oven to 250F.

In a large bowlcombine cereal, pretzels and nuts.  Set aside. 

In a small bowl combine oil through onion powder, and mix to combine.  Drizzle spice mixture over cereal mix, and toss gently until well coated.   Spread evenly on a baking sheet, sprinkle with chili flakes if using and bake for 30 minutes, giving the mixture a stir every 10 minutes. 

Once baked, remove from oven and sprinkle with sugar.  Let cool completely and store in airtight containers.

Wednesday 11 January 2012

Spicy Chicken, Vegetable, and Noodle Soup


When I'm battling a cold, a bowl of Campbell's just won't do.  The mushy noodles and microscopic pieces of chicken are no match for the rhinovirus. I prefer to wage a three-pronged attack. First, chicken broth - we're all familiar with its healing properties. Second, copious amounts of vitamins and nutrients - at least one green vegetable, one red, and one orange and enough garlic to repel the vampires from all three of the Twilight movies. Third, spice - nothing opens the sinuses like ginger and chili.

This soup can be adapted based on whatever happens to be in your fridge and pantry.  You could add mushrooms, bean sprouts, asparagus or spinach, substitute tofu instead of chicken, rice instead of noodles, and almonds or peanuts instead of cashews.  If you don't have red chili paste, use a bit of tomato paste and up the quantity of chili, coriander, lime and lemongrass. We often use one of those whole cooked chickens from the grocery store instead of raw chicken and save the leftovers for making stock. It's also important to taste the broth as you cook. You may need to adjust your seasonings as chilies can vary in their level of spice and every brand of stock will differ in saltiness. 

Makes 8-10 servings

1 tbsp grape seed oil
1 tsp sesame oil
1 red chili, minced
2 stalks of lemongrass
1 medium onion, sliced
3 cloves garlic, minced
2 tsp grated ginger
2 tsp Thai red chili paste
1/2 tsp ground coriander
2 medium carrots, grated
1 red pepper, julienned
juice and zest of 1 lime
1 litre chicken broth or stock
1 litre water (or another litre of chicken stock)
1 can coconut milk
4 chicken thighs, cooked and shredded
1/3 package enoki mushrooms (about a handful)
2 handfuls snow peas
3 oz soba or rice noodles
2 baby bok choy, roughly chopped
salt and pepper to taste
2 tbsp cashews, roughly chopped

Clean and prep all the vegetables ahead of time so that they're ready to add to the soup as needed.  For the lemongrass, use only the bottom 2-3 inches of the stalk, the roots and tops can be discarded.  Peel away the outer layers and mince the layers inside.

Warm the oils in a large pot. Saute the lemongrass and chili on medium-high heat for a few seconds, then add the onion, garlic, ginger, chili paste, and coriander. Saute for 3-5 minutes until the onions are translucent. Add the carrot, pepper and half the lime zest and saute for another minute. Add the chicken broth and water and bring to a simmer. Test the seasonings, you'll probably need to add a generous pinch of salt and a grating of pepper. You can also increase the spiciness if desired by adding more ginger or chili. Simmer for 10 minutes on medium heat to let the flavours merge.

Reduce the heat to medium low. Add the coconut milk and stir to combine. Add the shredded chicken, mushrooms, and snow peas. Cook for 1-2 minutes and then add the bok choy and noodles. Cook for 1-2 minutes longer or until the noodles are tender. Season with salt and pepper as needed. Serve in soup bowls and garnish with chopped cashews.

Tuesday 10 January 2012

Korean Beef in Lettuce Leaves

I am currently on a bit of a health-kick which means I'm trying to make it to the gym more often, curbing my alcohol consumption (don't worry...just for the month of January), and hunting for recipes that are lower in calories yet still taste delicious. This recipe is a review from my latest 'new fave' cookbook, The Flat Belly Diet by Liz Vaccariello.  After making this I would recommend some slight modifications.  One of the changes is inspired by a trip to San Francisco last summer where vast quantities of Dim Sum and beef in lettuce cups were consumed.  The cookbook recommends using Boston lettuce but at City View Restaurant, where our Dim Sum feast took place, the beef was served in iceberg lettuce leaves, neatly trimmed with pinking shears.  The perfect zigzagged edge made for a great presentation but I also recommend Iceberg as it is more cup-like, making it less likely that the filling will spill out on to your new sweater.  Iceberg lettuce also provides a crispier, crunchier texture than Bibb or Boston lettuce.  The second modification that I would highly recommend is upping the spice-factor by adding chili flakes, hot sauce (such as sriracha or sambal olek), or spicy garlic chili paste. Since I like it hot, I used all three!  

Adapted From: The Flat Belly Cookbook

4 Servings (3 per serving)

Nutrition per Serving (without modifications)
379 calories
26 g protein
18 g carbs
23 g fat
4 saturated fat
3 g fibre

3 tbsp 100% orange marmalade (in my opinion this made the recipe!)
2 tbsp soy sauce
1 tbsp hoisin sauce
1 tbsp ginger, grated
1 clove garlic, grated
pinch of chili flakes
1 tsp Siracha
1 tsp sambal oelek
1/4 cup canola oil
1 lb lean extra-lean ground beef
8 green onions, sliced (white and greens divided)
2 carrots, finely diced
1 yellow pepper, diced
Boston Lettuce or Iceberg Lettuce leaves

In a small bowl stir together, marmalade, soy sauce, hoisin, ginger, garlic and chili flakes, sauces or pastes. Set aside.

Heat oil in a large skillet over medium high heat, add beef and cook for 3 minutes, stirring often.  Next add carrots and cook for 5 minutes.  Add yellow pepper, whites of onions, and soy sauce mixture and cook for 5 minutes.  Stir in greens of onions and cook for 1 minute. 

Spoon beef mixture into lettuce leaves and enjoy!

Monday 9 January 2012

Duck Stock

Some might say that making your own duck stock takes too long, costs too much and that you should just buy Campbell's chicken stock for a dollar a can and add half a veggie bouillon cube ... and they're probably right.  However, I'm willing to bet that if you try it, you'll never go back.  Why? Because chicken stock is for peasants.  Kings eat duck stock!  Do you want to eat like a peasant?  I didn't think so.


Class warfare aside, duck stock is to chicken stock as duck is to ... well to chicken.  It's vaguely similar but more flavorful and hearty.  Duck stock is ideal for those times where you want more oomph than chicken stock but don't want to overpower other flavors in the dish as beef stock might.  I use it when cooking hearty veggies, risottos and soups. Of course if you have a leftover chicken or even turkey, this recipe works just fine.

1 leftover bird carcass with almost all meat removed
2 stalked celery roughly chopped
2 carrots peeled and chopped
3 cloves garlic diced
2 cooking onions
6 cups water
1 lemon wedge
1 tbsp olive oil
3 tbsp salt (you may well need more as stock ALWAYS takes more salt than you think)
1 tsp each thyme, sage, rosemary and smashed black peppercorns (if you're using ground pepper only use 1/2 tsp)

Put the bird carcass in a 400F oven for about 30 minutes to brown the bones.  The goal is to brown the bones as much as possible without burning them so you can go lower and slower if you like.  The meat will all dry out and start to look like duck jerky but that's okay because you're not eating it.

When the bones are browned, add the olive oil to the pot and sweat the veggies over high heat for ~5 minutes.  You should get them just to the point where they start to smell AMAZING but not really any further.

When the aromatics are sweated, add in the herbs, pepper and half the salt.  Stir for a few minutes and then add the duck carcass, water and the lemon wedge, cover and bring to a boil.  Once boiling, turn down to a simmer, skim the foam from the top and cook for 1-2 hours, topping up with water periodically if the bird becomes uncovered.  After the first 20 minutes taste the stock and season with salt as necessary.  It should taste only slightly salty as the saltiness will increase as the stock reduces.

When done, remove from heat and let cool.  Line a chinois or other large strainer with cheese cloth to filter out all the bits (If you don't have any, just use your strainer and pour slowly to leave all the heavy bits at the bottom of the pot).  Discard the filtered bits and transfer the stock to containers and refrigerate or freeze.

If you've got limited freezer space then a great trick is to further reduce the stock by half or more and then freeze it in ice cube trays.  You can then reconstitute the stock cubes in a cup of water or drop the cubes into your dishes when cooking to add a huge flavour boost.